
Origami, the art of paper folding, is a delightful pastime that allows you to create intricate designs using a simple sheet of paper. Among the many fascinating origami creations, the origami boat is a classic and timeless design that can be easily mastered by beginners. In this guide, we will walk you through the steps to create a simple origami boat.
To begin, select a square sheet of paper. You can use origami paper, colored paper, or even a plain white sheet. Place the paper in front of you, ensuring that one corner is facing upwards.
Fold the paper in half diagonally, creating a triangle. Make sure the edges are aligned accurately, and crease the fold firmly. Next, unfold the triangle and repeat the same step by folding the paper diagonally in the opposite direction. Once again, unfold the paper to reveal a creased “X” shape.
What you need;
Square piece of paper:
How do you make an origami boat step by step?
Origami boats are a classic and enjoyable paper folding project. In this step-by-step guide, we will walk you through the process of creating an origami boat. With just a square sheet of paper and a few simple folds, you’ll be able to make your very own paper boat. Whether you’re a beginner or an experienced origami enthusiast, this guide will help you create a charming origami boat that can sail your imagination’s seas. Let’s dive into the world of origami and get started on this delightful project.
Certainly! Here is a step-by-step guide to making an origami boat:
Step 1
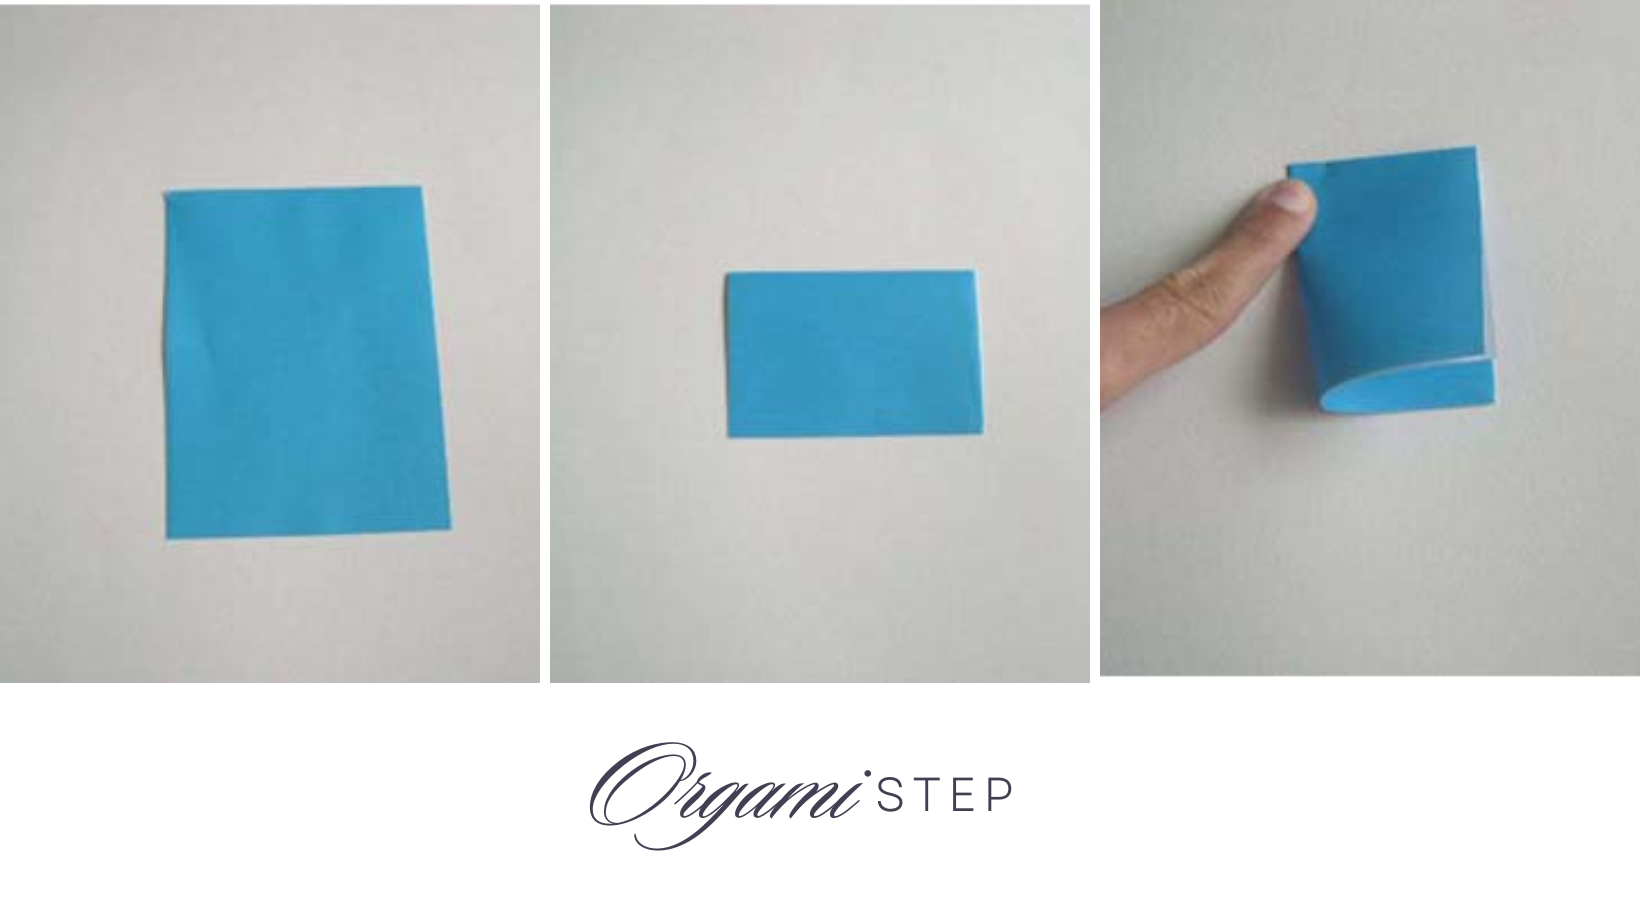
Take the object and fold it in half according to the demonstrated method. Afterward, proceed to fold it once more, but only partially this time, creating a crease in close proximity to the upper section.
Step 2
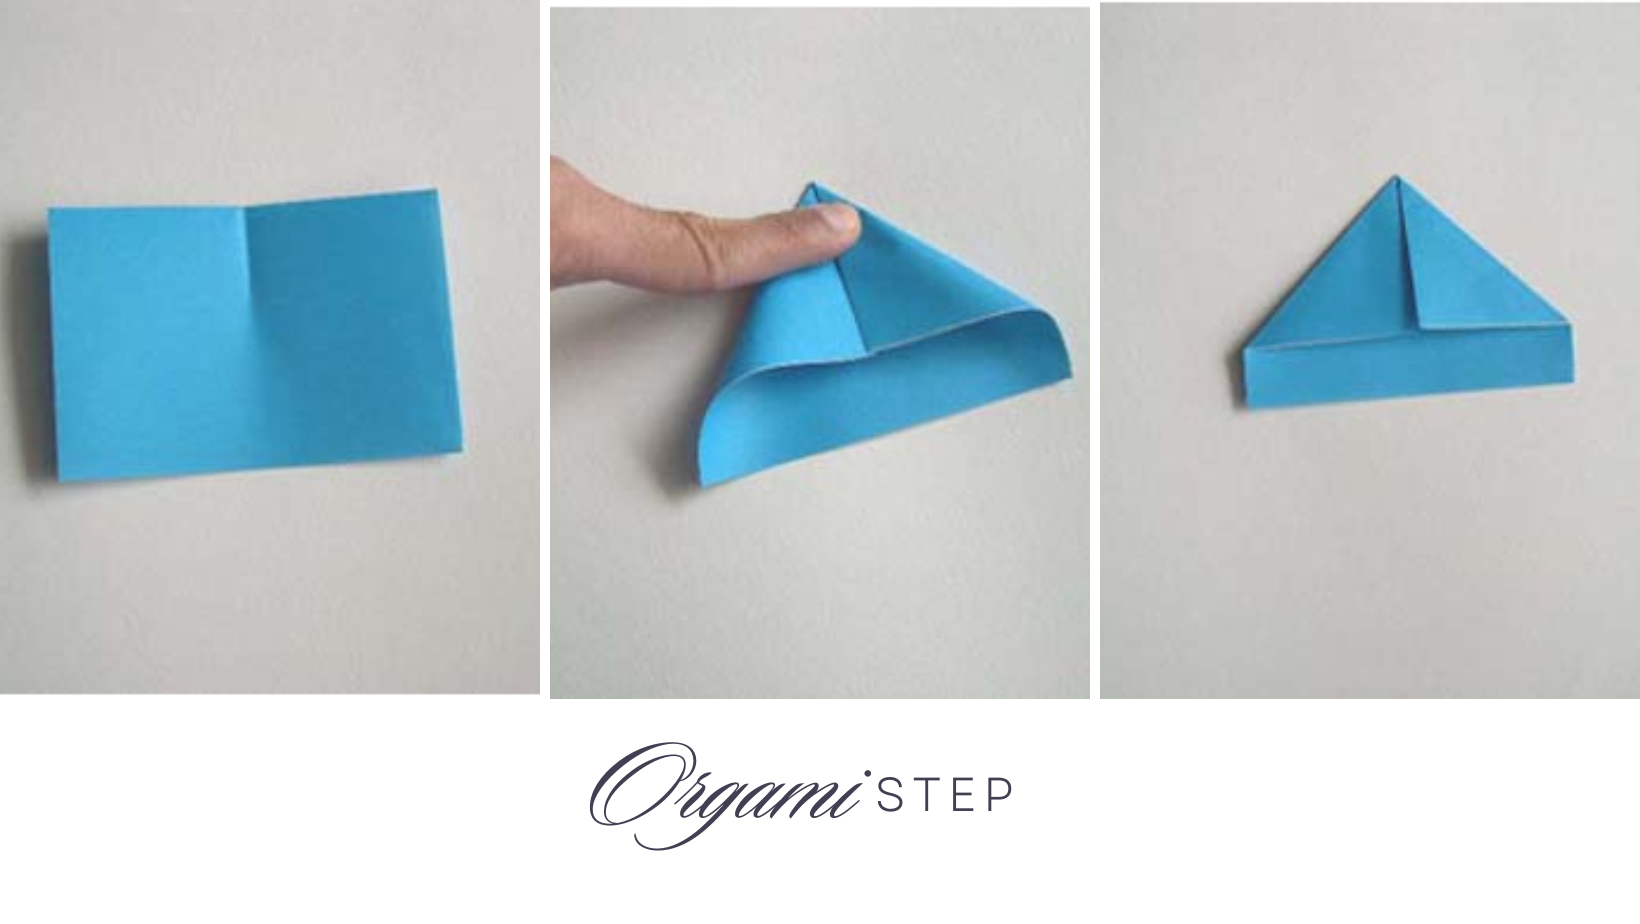
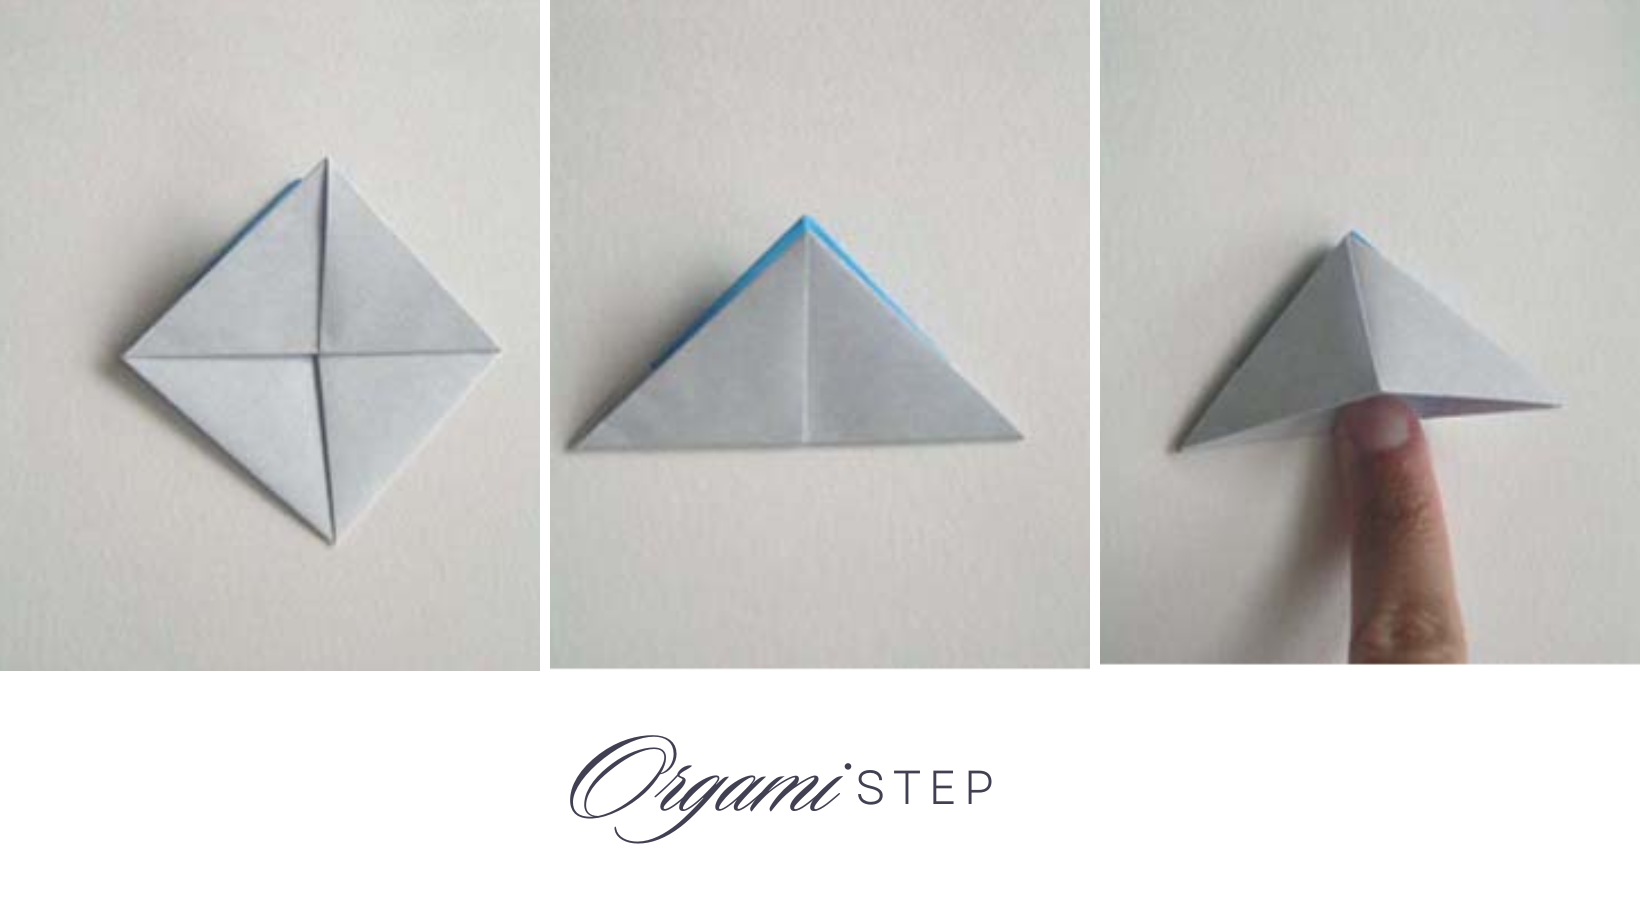
Please refer to the image on the left below, where you can clearly observe the crease. This crease serves as a guide to align the corners appropriately. Proceed to fold down the corners as indicated in the image below.
Step 3
Begin by folding each edge of the paper upwards, following the instructions provided. As demonstrated, use your fingers to carefully open up the folds, resulting in the formation of a hat.
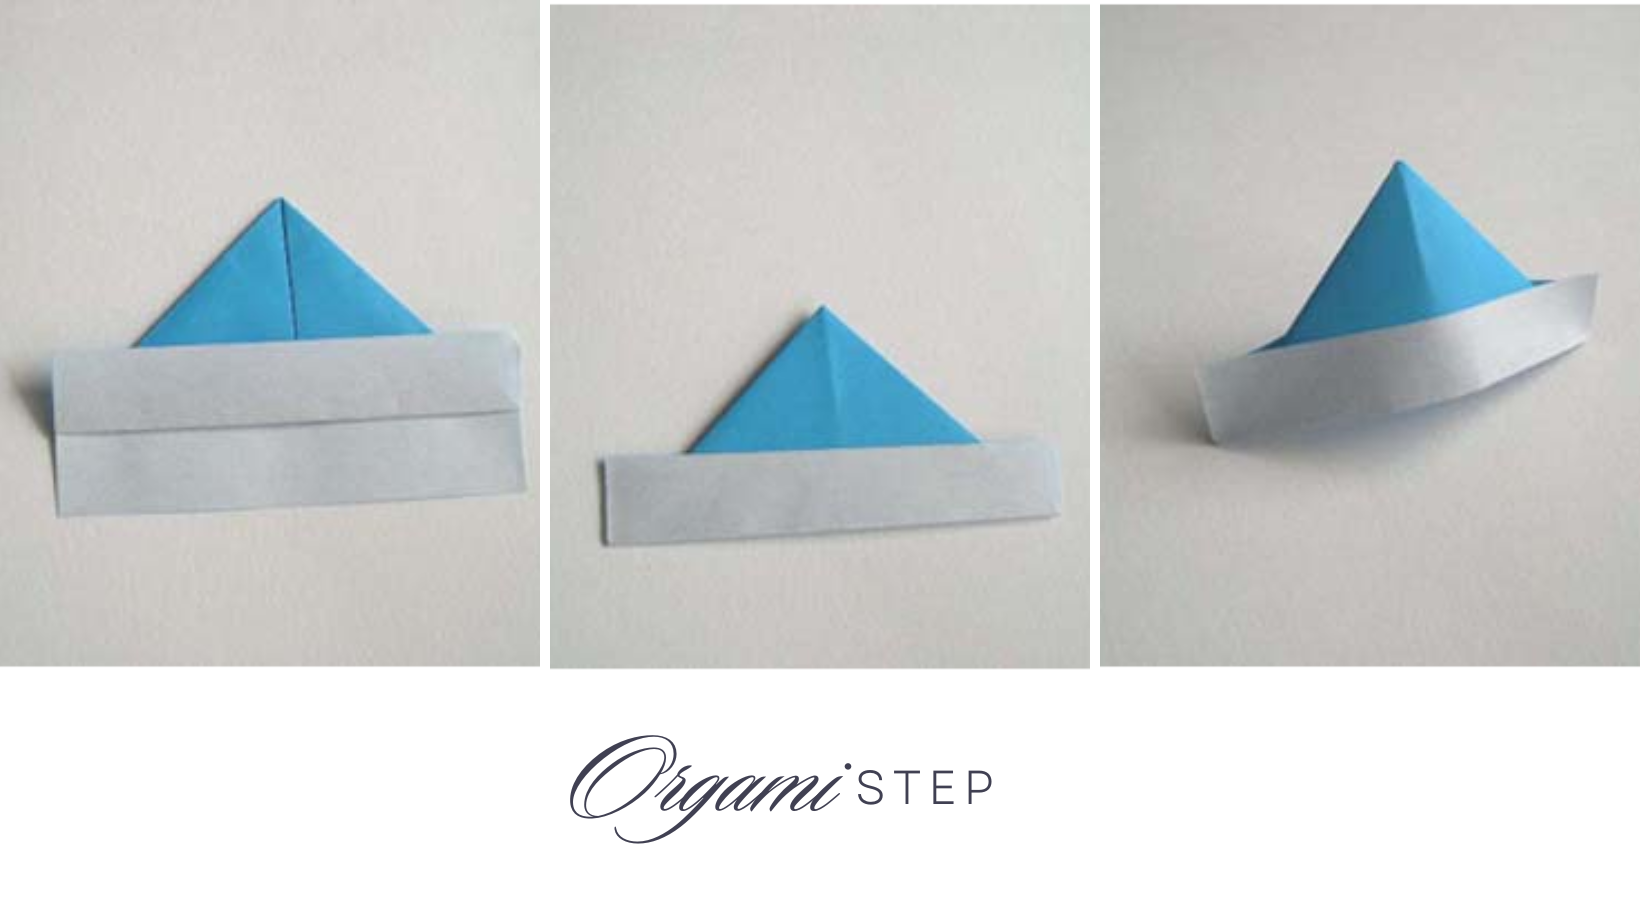
At this point, you can choose to conclude the folding process and enjoy your hat. However, if you wish to proceed further, you have the option to transform the hat into a boat.
Step 4
To transform the hat into a square shape, bring the corners of the hat brim towards each other. As you do this, you will notice that the edges of the brim will naturally push outwards. This action can be likened to “squashing” the hat, gradually reshaping it into a square.
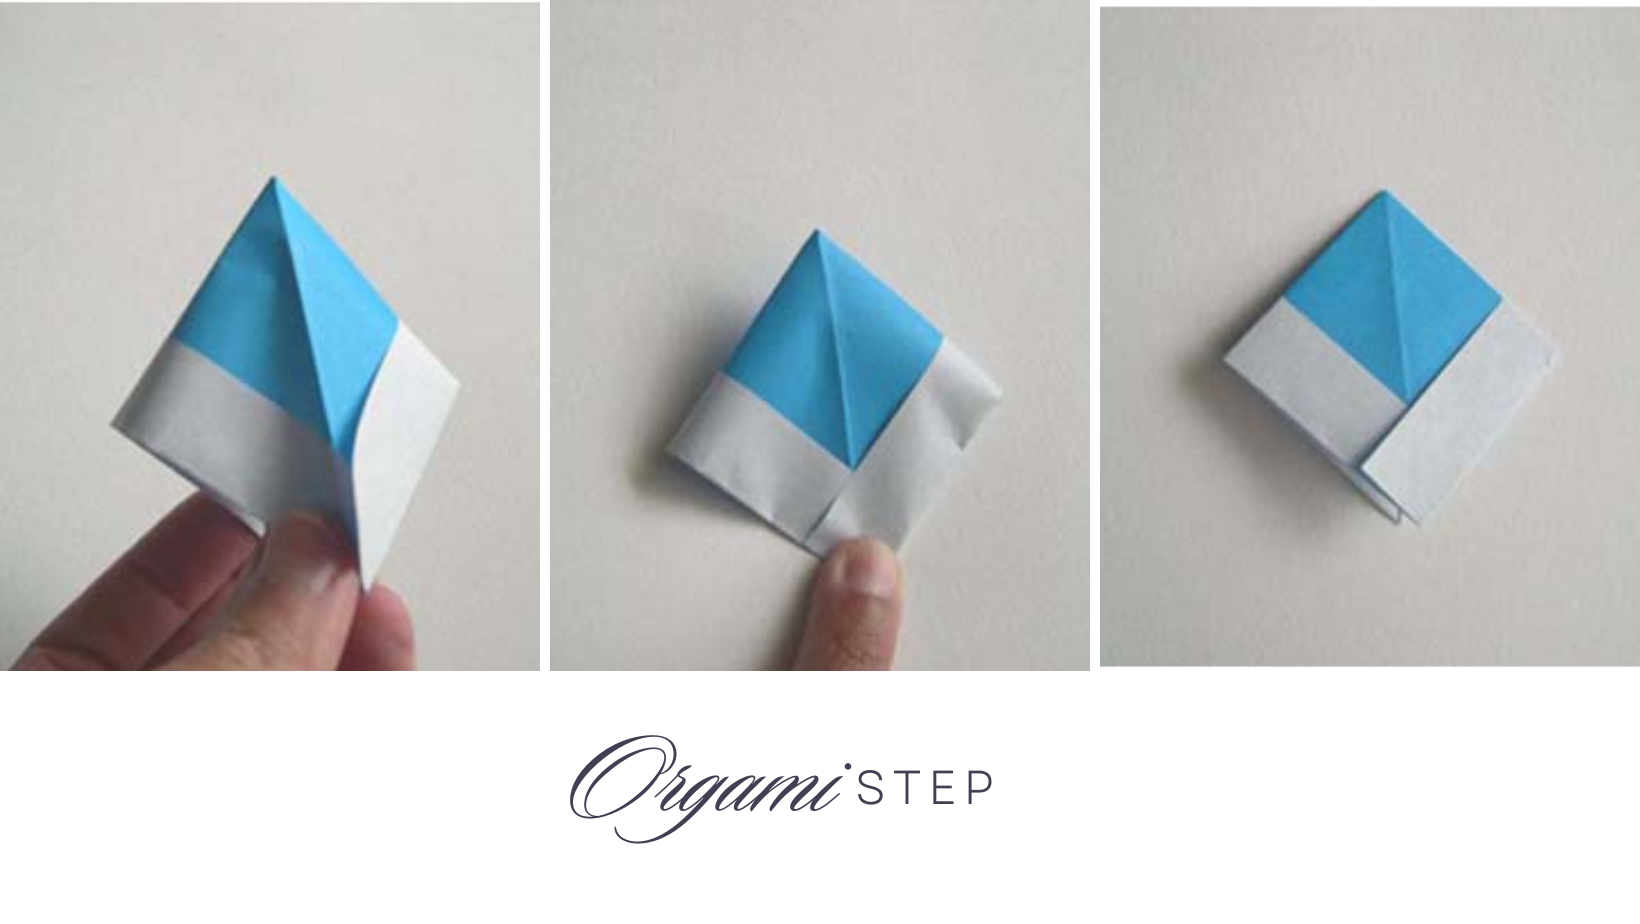
Step 5
Next, select one of the lower corners of the square and fold it upwards, creating a triangular shape. Flip the folded piece over and repeat the same folding process for the other corner. Now, you should have a folded triangle. To continue, carefully open up the folded triangle and bring the corners together, aligning them neatly…
Step 6
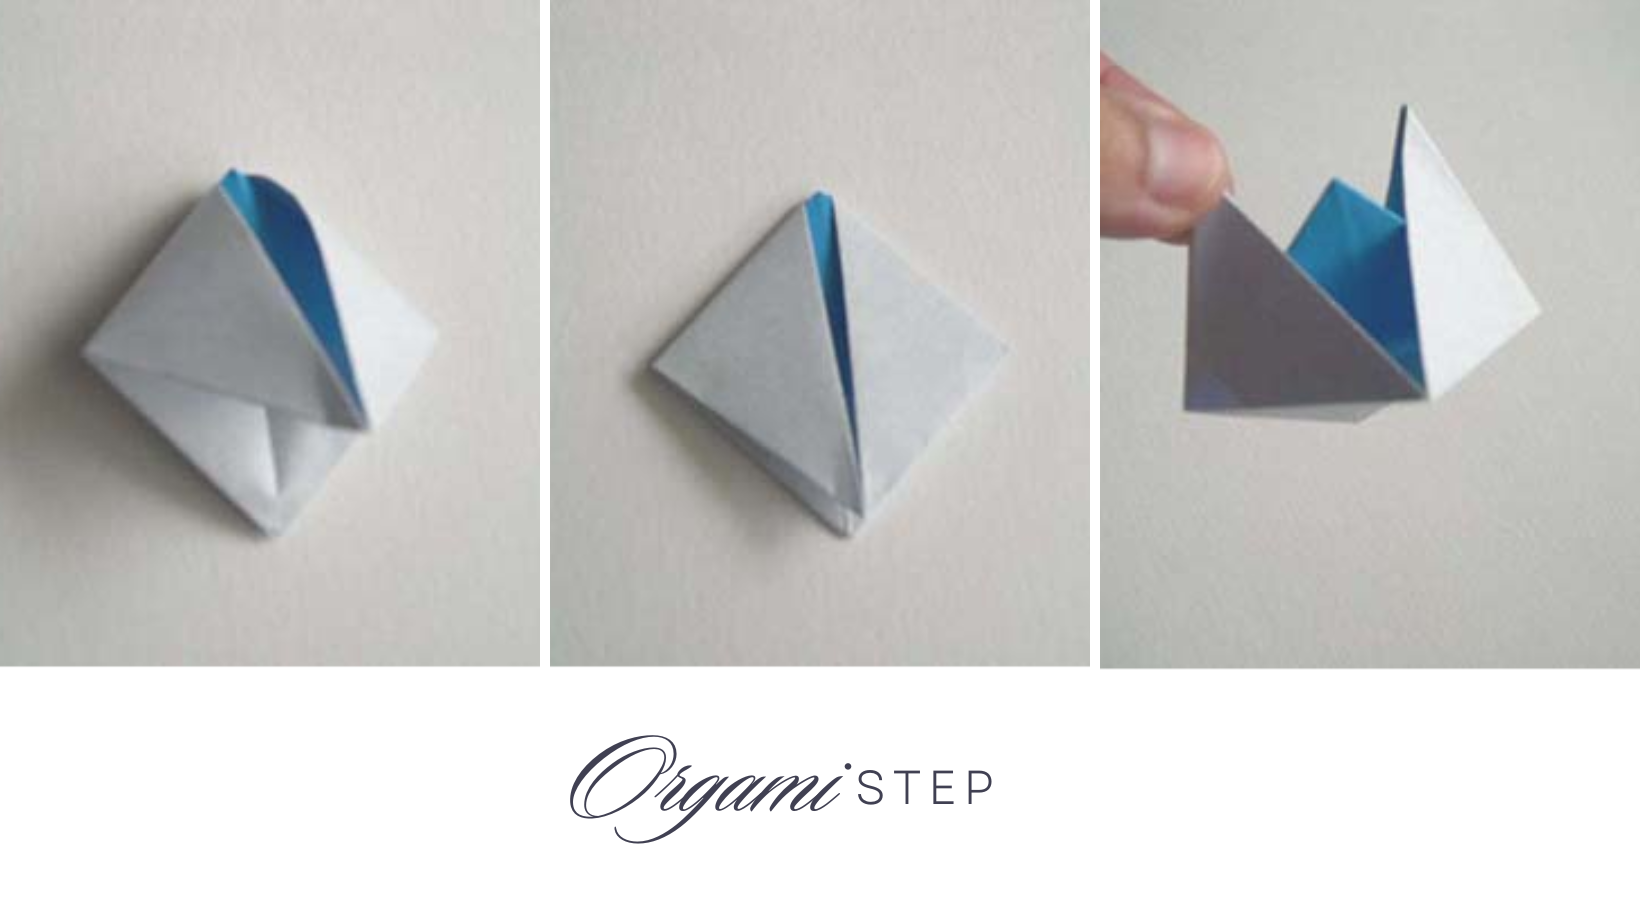
Once you have the folded triangle, proceed to “squash” it again into a square shape, similar to the middle photo provided. Gently pull on the folded edges to unfold the paper and reveal the boat shape. If you prefer, you can turn the boat over and expand the hole in the bottom. Enlarging the hole will improve the boat’s balance and floating ability.
Watch Video Tutorial
Frequently Asked Question
Can I use any size of paper to make an origami boat?
While it’s possible to make an origami boat with different sizes of paper, it is generally easier to work with a square sheet of paper. The size of the paper will determine the final size of the boat. Larger paper will result in a bigger boat, while smaller paper will create a smaller boat. It’s recommended to start with a square piece of paper, but you can experiment with different sizes to achieve the desired result.
What if I don’t have origami paper?
If you don’t have origami paper, you can use any square-shaped paper, such as regular printer paper, construction paper, or even recycled paper. You can easily make a square from rectangular paper by folding it diagonally and trimming off the excess. The key is to have a square shape to begin with, as it makes the folding process easier.
Can I decorate or personalize my origami boat?
Absolutely! Origami boats can be a fun and creative project. Once you’ve folded your boat, you can use markers, crayons, or colored pencils to add designs or patterns to the paper. Just be mindful not to use heavy materials that may weigh down the paper or make it difficult to fold.
How can I make the origami boat float in water?
While origami boats are not typically designed to float for extended periods, you can take some steps to make them float temporarily. You can apply a thin layer of waterproof sealant or wax on the surface of the boat to make it more water-resistant. Additionally, you can use lightweight materials, such as toothpicks or small pieces of cork, to create a simple raft-like structure underneath the boat, which can improve its floating ability.
Can I unfold the origami boat once it’s folded?
Yes, you can unfold the origami boat by reversing the folding steps. Gently unfold the paper along the creases you made, taking care not to tear or damage the paper. This allows you to reuse the paper or try folding a different origami model.
Conclusion
Making a simple origami boat is a fun and enjoyable activity. All you need is a square piece of paper, and you can follow the step-by-step instructions to create your own boat. Remember, while origami boats may not float for an extended period, you can decorate them and make them temporarily float by applying a waterproof sealant or adding lightweight materials. Don’t hesitate to get creative and personalize your origami boat. Enjoy the process of folding and have fun with your finished creation!
